Gerhard Lowe
Australia, the Home of InClass school timetabling
Quick start – First Step:
As with any school timetabling program, collecting and saving basic information is essential.
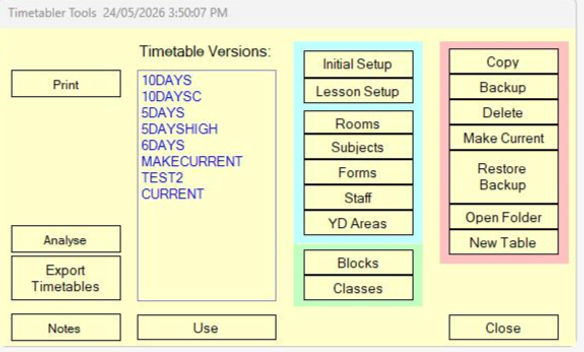
On the timetabler tools form, you enter the basic information:
Please follow the setup steps if a timetable is selected:
Rooms Setup
Subjects Setup
> down to YD Areas
Due to editing, Graphics may change over time
Enter all rooms that you may
use for teaching, classrooms and also special rooms like kitchen, theater and others.
Enter all subjects:
The subject code appears on the timetable.
Subjects need to get entered before teachers are set up as subjects get assigned to teachers.
Under the subject tag are subjects in groups collected.
After completion of steps 1 to 3 the process can get finalized by entering the forms, and according to the academic plan of the school, the subjects for each class including blocks or lines. These are the classes taught at the same time throughout the year to enable students choices.
Enter all forms. These are displayed on the time table in the order you have entered these. If you need to enter a form at an index, select the form where you want to place the new one. This will be indicated in the green field. Just enter the form code and click Add. Or use drag and drop.
Forms should be the same for all timetables. When starting up, enter the forms, these forms are globally the same for every timetable.
Enter all staff with teaching subjects and up to the level the teacher can teach. Also try to enter correct maximum number of lessons the teacher may teach.
In this form you create blocks (lines) for the selected timetable. These are the classes and subjects that need to stay together until changed to allow subject selection of students. To start creating a block:
Blocks need to get created before classes as their lesson count is used in the class generation.
1) Click the Clear button
or highlight "Enter new block here"
2) Enter the block name and a description
3) Enter the classes that go into the block
4) Enter the subjects
5) Enter the number of Lessons
6) Don't forget to save